How to do machine applique
Machine applique is a quick and effective way to decorate a sewing project, whether it is a floral pattern on a tablecloth, or a teddy bear on a child's garment.
Best of all it is not difficult!
You will need
- A sewing machine that does a close zigzag satin stitch
- A new, sharp needle (size depends on the thread you are using)
- Machine Embroidery thread
- A template (freezer paper is ideal for this)
- Two pairs of sharp scissors (one for paper and for one cutting thread ends)
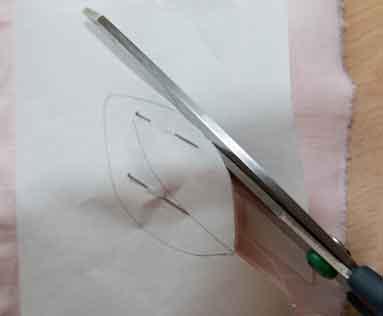
Start by drawing your shape onto the paper side of freezer paper, then pin it to your applique fabric and cut it out. Don't use your best dressmaking shears for this, but do ensure the scissors are sharp so they do not chew the fabric. You want a nice clean edge to your fabric shape.
Cut through both the paper and fabric as one, rather than cutting the shape first then the fabric.

Thread your machine with machine embroidery cotton, both top and bobbin. You may wish to match the color of the base fabric, the applique shape, or alternatively use a contrasting shade.
For the photos on this page I used a cream thread to match the background.
Set your machine up to do a zigzag stitch that is 1.5mm wide, with a length of between .5 and 1mm.
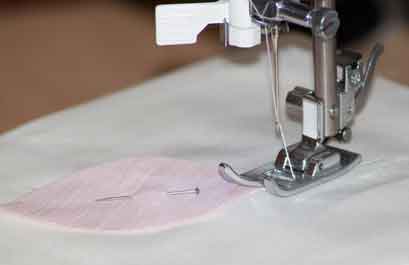
Use your normal zigzag foot or a clear sating stitch foot if you have one, and position it so that the edge of the fabric is lined up with the straight gap at the front of the foot as shown in the photo below.

Stitch backwards for a few stitches (my machine has a button to press to do this) to secure the thread. Then work your way around the shape, slowly, taking care around curves not to stretch or bunch up the fabric.
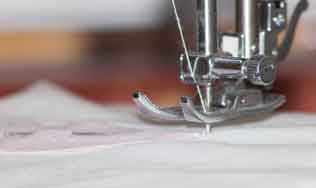
When you reach a sharp point or corner, ensure the needle is down in the fabric and then lift the foot. Turn the fabric, so that you can do the stitching in the other direction, then gently lower the foot again to continue.

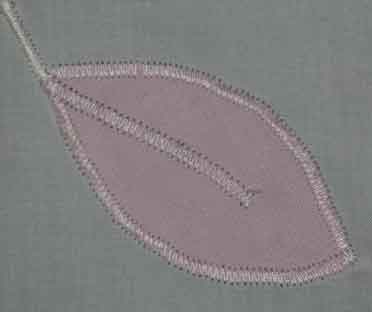
I chose a leaf shape as my demonstration. You can see where the stitching changes direction at the point in the photograph below.
Depending on the shape of your machine applique you may also wish to add further stitching to decorate. In my example I added a stem and vein to my leaf.
